
Platform Engineering with AI
Want to apply AI, not just read about it? No more words - let's build the thing. AI-powered internal dev portal in just 15 minutes. Surprise yourself!
Using Backstage to Build an Internal Developer Portal (With AI and .NET)
Have you ever needed to update a service, but forgot what it does? Or spent time trying to understand code you haven’t touched in months? Why don’t we have an up to date readme.md file telling us all the most important things? Or better yet, a whole dev portal, build by devs for devs!
Let’s do exactly that - build a powerful developer portal using Backstage, a leading open-source tool for building internal developer hubs.
We will build a working portal using:
- Backstage (UI to explore services)
- .NET Core
- Ollama (AI summaries)
- Netlify (hosting the portal)
Everything will be simple and written concise, perfectly for busy techies.
TIP
Want to skip ahead? Check out the complete working demo on GitHub with all the code ready to run!
1. Why Use a Developer Portal?
A developer portal is like a consolidated home for all your services/applications. You can:
- See all your services in one place
- Know who owns what
- Read summaries of each service
- View API docs and try them out
- Help new team members get started fast
You can also add links to business documentation, metrics, deployment data, and more. You decide what’s useful.
2. What We Will Build
Here’s the plan:
- Create two scaffolded .NET projects
- Create .NET CLI to scan the project folders
- Use AI (Ollama) to generate short summaries
- Feed this metadata into a Backstage portal
- Host the portal on Netlify
INFO
Why Ollama? Because it runs locally and you do not want to expose your code to the AI agents in public internet. You do not know what and how they use it for, and it does not feel safe. If your employer finds out, you’re done - it is not your employer anymore :)
3. Project Setup
You can either follow along and build everything from scratch, or clone the demo repository to get started immediately.
To clone the demo:
git clone https://github.com/bgener/demo-backstage-catalog-generator.git
cd demo-backstage-catalog-generator
To build from scratch, install the following tools:
- .NET SDK 8+
- Node.js (includes
npx) - Ollama
Verify your setup:
dotnet --version
node --version
npx --version
ollama --version

# download and run the LLM model we will use in this guide
ollama pull llama3
ollama run llama3
4. Create .NET Projects
We’ll create two simple services: one Web API, one MVC.
mkdir Backstage-Dev-Portal
cd Backstage-Dev-Portal

dotnet new webapi -n ServiceA
dotnet new mvc -n ServiceB

dotnet new sln -n Backstage-Dev-Portal
dotnet sln add ServiceA/ServiceA.csproj
dotnet sln add ServiceB/ServiceB.csproj
You can replace the default controllers with real logic later.
5. Build the CLI Tool (ProjectSummarizer)
We will build a .NET CLI tool using OllamaSharp. It will:
- Summarize each service using AI
- Generate a single
catalog-info.yamlfile containing all services
Instead of analyzing all files, we take a smarter approach:
- Send only
*.csproj,Program.cs, and the folder structure - This helps the AI understand the project structure and purpose
Step 1. Create the CLI Tool
dotnet new console -n ProjectSummarizer
cd ProjectSummarizer
Step 2. Add NuGet Packages
dotnet add package OllamaSharpStep 3. Generate Summary with AI
Locate the file Program.cs and insert the following code:
using OllamaSharp;
using System.Text;
string sourceCodePath = Path.GetFullPath(args[0]); // or hardcode the directory path
Console.WriteLine($"Scanning files in {sourceCodePath}...");
var projectFiles = Directory.GetFiles(sourceCodePath, "*.csproj", SearchOption.AllDirectories);
var uri = new Uri("http://localhost:11434");
var ollamaApiClient = new OllamaApiClient(uri) { SelectedModel = "llama3" };
var chat = new Chat(ollamaApiClient);
foreach (var csprojPath in projectFiles)
{
var sb = new StringBuilder();
var projectDir = Path.GetDirectoryName(csprojPath)!;
var projectName = Path.GetFileNameWithoutExtension(csprojPath);
sb.AppendLine($"Project: {projectName}");
sb.AppendLine("Folder structure:");
AppendFolderStructure(projectDir, sb, "");
sb.AppendLine("\n.csproj content:\n");
sb.AppendLine(File.ReadAllText(csprojPath));
var programPath = Directory.GetFiles(projectDir, "Program.cs", SearchOption.AllDirectories).FirstOrDefault();
if (programPath != null)
{
sb.AppendLine("\nProgram.cs content:\n");
sb.AppendLine(File.ReadAllText(programPath));
}
var prompt = "Summarize the project in 1-2 sentences based on the files provided, keep it concise. " +
"Do not output anything else. " +
"I expect an output similar to the below: " +
"- This system exposes REST APIs to provide weather forecasts with temperatures in range 0-100.\n\n" +
"- This system represents asp.net mvc with reactjs and bootstrap css framework, allowing to manage todo items." +
sb.ToString();
Console.WriteLine($"\n\n==== Summary for {projectName} ====");
await foreach (var answerToken in chat.SendAsync(prompt))
Console.Write(answerToken);
Console.WriteLine("\n===============================");
}
static void AppendFolderStructure(string rootPath, StringBuilder sb, string indent)
{
foreach (var dir in Directory.GetDirectories(rootPath))
{
var dirName = Path.GetFileName(dir);
sb.AppendLine($"{indent}- {dirName}/");
AppendFolderStructure(dir, sb, indent + " ");
}
foreach (var file in Directory.GetFiles(rootPath))
{
var fileName = Path.GetFileName(file);
sb.AppendLine($"{indent}- {fileName}");
}
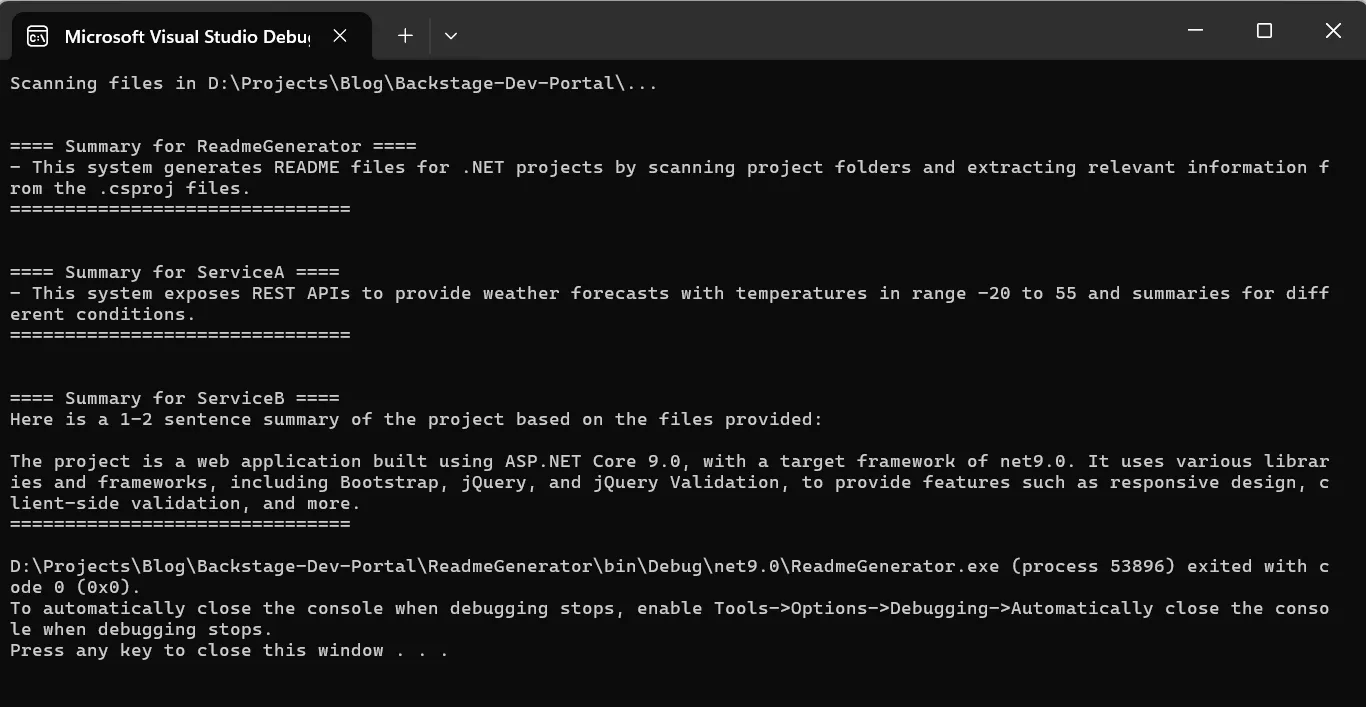
}Step 4. Initial Run
Finally, run it:
dotnet run --project ProjectSummarizer -- "D:\Projects\Blog\Backstage-Dev-Portal"Don’t you like it?
Guess what? Most of the work is in figuring out with the prompt, I swear I spent more time playing around with the right prompt than writing .NET code.
TIP
Play around with the prompt. You will notice that even a tiny update to it might suddenly produce a totally different output. I encourage you to modify the promnpts trying to improve it and see how that changes. Similarly, pull other models and play with them. That’s the real learning here!
Step 5. Generate Service Catalog
Backstage uses a special file catalog-info.yaml to display information about service catalog. A sample file might looks as foolows:
---
# First service
apiVersion: backstage.io/v1alpha1
kind: Component
metadata:
  name: ServiceA
  description: ...
spec:
  ...
---
# Second service
apiVersion: backstage.io/v1alpha1
kind: Component
metadata:
  name: ServiceB
  description: ...
spec:
  ...
We are already able to generate summary for each our project, let’s prepare the service catalog for Backstage portal. Back to the file Program.cs and insert the update code as shown below:
  var catalogEntries = new List<string>();

foreach (var csprojPath in projectFiles)
{
    var sb = new StringBuilder();
    var projectDir = Path.GetDirectoryName(csprojPath)!;
    var projectName = Path.GetFileNameWithoutExtension(csprojPath);

    sb.AppendLine($"Project: {projectName}");
    sb.AppendLine("Folder structure:");
    AppendFolderStructure(projectDir, sb, "");

    sb.AppendLine("\n.csproj content:\n");
    sb.AppendLine(File.ReadAllText(csprojPath));

    var programPath = Directory.GetFiles(projectDir, "Program.cs", SearchOption.AllDirectories).FirstOrDefault();
    if (programPath != null)
    {
        sb.AppendLine("\nProgram.cs content:\n");
        sb.AppendLine(File.ReadAllText(programPath));
    }

    var prompt = "Summarize the project in 1-2 sentences based on the files provided, keep it concise. " +
                 "Do not output anything else. " +
                 "I expect an output similar to the below: " +
                 "- This system exposes REST APIs to provide weather forecasts with temperatures in range 0-100.\n\n" +
                 "- This system represents asp.net mvc with reactjs and bootstrap css framework, allowing to manage todo items.\n\n"
                 + sb.ToString();

    Console.WriteLine($"\n\n==== Summary for {projectName} ====");

    var summaryBuilder = new StringBuilder();
    await foreach (var token in chat.SendAsync(prompt))
        summaryBuilder.Append(token);

    var summary = summaryBuilder.ToString().Trim();
    Console.WriteLine(summary);
    Console.WriteLine("\n===============================");

    var yamlEntry = $@"
apiVersion: backstage.io/v1alpha1
kind: Component
metadata:
  name: {projectName.ToLowerInvariant()}
  description: {summary}
spec:
  type: service
  lifecycle: production
  owner: your-team";

    catalogEntries.Add(yamlEntry);
}

string multiDocYaml = string.Join("\n---\n", catalogEntries);
var rootCatalogPath = Path.Combine(sourceCodePath, "catalog-info.yaml");
File.WriteAllText(rootCatalogPath, multiDocYaml);
6. Setup Backstage
Install Backstage:
npx @backstage/create-appFollow the prompts to name it dev-portal.
Point Backstage to your generated catalog-info.yaml file (replace the existing file). To run it locally:
cd dev-portal
yarn dev
You should see all your services listed with AI-generated summaries.
7. Deploy to Netlify
Build your portal:
yarn build:staticPush it to GitHub and connect it to Netlify.
- Set build command:
yarn build:static - Set publish directory:
dist
Your portal is now live and shareable!
Final Words
You now have a smart, AI-powered internal portal that documents your services in real time. It helps you:
- Stay productive
- Onboard teammates quickly
- Keep documentation fresh
That said, this is a very simplified example of what it takes to build a fully functional internal developer portal powered by AI. In real-world scenarios, there are more complex challenges you’ll need to tackle, including:
- Authentication and authorization. Who can see what? RBAC, SSO integration, and team-specific access are critical.
- Context-aware AI. Summaries are cool, but getting accurate and relevant AI output without hallucinations is a whole new problem.
- Synchronizing with source of truth. Keeping metadata, code, and dependencies in sync with GitHub.
So while this setup is a great starting point, think of it as the scaffolding. The real value of a developer portal comes when it becomes a daily tool your team trusts, contributes to, and evolves with.